Why Your Toilet Keeps Running Even After Repairs
Toilet still running after multiple repairs? Learn when to replace the flapper, the fill valve, or the whole toilet—and how to stop wasting water and money.
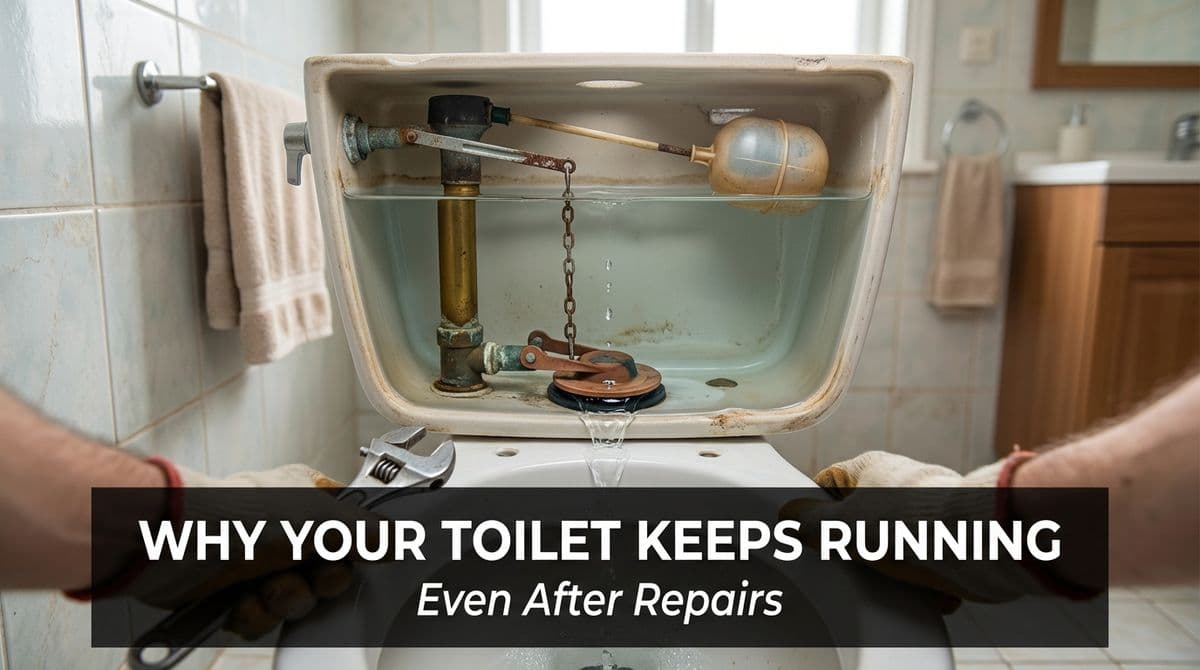
Why Does My Toilet Keep Running Even After Repairs?
We recently got a call from a homeowner — let’s call her Sarah — who was at her wits’ end with one stubborn toilet. The toilet would quietly leak water from the tank, the fill valve would kick on to refill, then it would stop… only to start again a little while later.
Sarah told us she’d already had two different plumbers out in the past year. Parts had been replaced (she wasn’t sure which ones), the toilet would behave for a bit, and then the same running issue came back. The toilet was original to the house from the 1990s, and she was starting to wonder, “Is this toilet just cursed, or is there something I’m missing?”
That conversation is one we have pretty often, so I want to walk you through exactly how we look at these situations, when it makes sense to repair, when to replace a couple of key parts, and when it’s time to say goodbye to the entire toilet.
The Three Usual Suspects: Flapper, Fill Valve, Flush Valve
From the moment Sarah described the symptoms — a slow leak with periodic refilling — we were already thinking of the three most common internal toilet issues:
- Flapper – The rubber piece at the bottom of the tank that lifts when you flush and seals when the tank refills.
- Fill valve – The vertical mechanism that controls how water refills and shuts off inside the tank.
- Flush valve (overflow tube and seat) – The plastic assembly that the flapper sits on and seals against.
In a lot of cases, homeowners or even pros will replace only the flapper or only the fill valve. That often works for a little while, but here’s the catch: all those parts are the same age, sitting in the same water. If one is worn out, the others usually aren’t far behind.
That’s why, when we talked with Sarah, we recommended what we usually suggest: if we’re already out there for a service call, it’s smart to replace both the flapper and the fill valve together, assuming the flush valve is still in good shape.
When Replacing Parts Stops Working
Sarah’s toilet had already seen multiple repairs, so we also had to consider the less common but more serious problem: a worn or cracked flush valve. That’s the plastic base where the flapper sits and seals. If that surface is warped or damaged, you can put five brand-new flappers on it and it will still leak.
To replace a flush valve, we usually have to remove the tank from the bowl, drain everything, replace the entire assembly, and re-gasket the tank-to-bowl connection. It’s a more involved job, which is why we stop and ask a key question first: How old is this toilet, and is it worth the investment?
Age and Condition: When to Consider a New Toilet
In Sarah’s case, the toilet was from the 1990s. That means:
- It likely uses more water per flush than modern high-efficiency models.
- Plastic and rubber components inside have been aging for decades.
- Porcelain can develop hairline cracks or imperfections that aren’t obvious at first glance.
If we open a tank like that and find multiple failing components, it often doesn’t make financial sense to keep throwing parts at it. Instead, we’ll talk about replacement and, when possible, we’ll credit a portion of recent repair costs toward a new toilet. That way, the money you’ve already spent isn’t wasted.
Hidden Costs: Water Waste From a Running Toilet
A toilet that “only” runs occasionally can still waste a surprising amount of water. Depending on the severity of the leak, you can lose anywhere from a few gallons to hundreds of gallons per day without seeing water on the floor.
Here are a few signs your toilet might be silently costing you money:
- Your water bill has crept up without any obvious change in use.
- You hear the tank refilling randomly when nobody has flushed.
- The water level in the bowl seems to move up and down.
- You notice a faint trickle sound in the tank.
If you’re unsure, you can do a simple food coloring test: put a few drops of food coloring in the toilet tank, wait 15–20 minutes without flushing, and see if the color appears in the bowl. If it does, you have a leak past the flapper or flush valve.
Compatibility Matters: Not All Parts Fit All Toilets
Another thing we explained to Sarah is that modern replacement parts are much more universal than they used to be, but they’re not one-size-fits-all. Some brand-specific toilets, older models, or specialty designs need particular flappers or valves to work correctly.
If the wrong part has been used in previous repairs — even if it “mostly” fits — you might see:
- A flapper that doesn’t seal perfectly on the flush valve.
- An over-aggressive fill valve that causes splashing or noisy refilling.
- Improper water level settings that cause constant overflows into the overflow tube.
That’s why, on our initial call, we often ask what we asked Sarah: “Can you send a clear photo inside the tank?” A quick photo lets us identify the style and often the brand, so we can bring the right parts the first time.
What to Expect During a Service Visit
When we come out for a running toilet, we generally follow a simple process:
- Visual inspection – We remove the tank lid, check the water level, look for obvious leaks, and inspect all the internal parts.
- Dye or leak test – If needed, we use dye to confirm whether the leak is through the flapper or elsewhere.
- Discuss age and options – Based on the toilet’s age and condition, we lay out repair versus replacement choices.
- Replace parts or toilet – If it makes sense to repair, we typically replace both the flapper and fill valve together. If there’s a bad flush valve and the toilet is old, we’ll talk honestly about whether a new toilet is the better investment.
- Adjust and test – We set the proper water level, adjust the chain, and flush several times to confirm there are no more leaks or ghost refills.
How to Extend the Life of Your Toilet
Whether you repair or replace, a few simple habits help keep your toilet trouble-free longer:
- Avoid drop-in tank tablets – Many of these contain chemicals that break down rubber parts faster.
- Check inside the tank once or twice a year – Look for deteriorating rubber, rusted metal parts, or unusual water levels.
- Listen for random refills – If you hear the tank kick on when nobody’s used it, call before the problem gets worse.
- Know your toilet’s age – If it’s more than 20–25 years old and keeps acting up, start budgeting for a replacement.
So, Repair the Flapper, Replace the Valve, or Get a New Toilet?
Here’s how we usually break it down for homeowners like Sarah:
- Just the flapper: Makes sense if the toilet is fairly new, other parts look good, and this is the first issue.
- Flapper + fill valve together: Best choice for many mid-age toilets, especially if you’re paying a service call anyway.
- Flush valve replacement: Worth it for newer or higher-end toilets where the porcelain is in great shape.
- Full toilet replacement: Smart move for older toilets (90s or earlier), repeated failures, or when several major parts are worn.
If your toilet keeps running despite multiple repairs, it doesn’t mean you’re unlucky — it usually means the whole system needs to be evaluated, not just one part at a time. With a careful inspection and an honest conversation about age, cost, and water waste, we can help you decide whether it’s time for one more repair or a fresh start with a new, efficient toilet.